
How do you gather customer insights? How about sales leads? Or are you still internally using paper forms that have to be entered into a database? There’s a way to do all this and more, using Microsoft Forms – the survey-taking app included in Microsoft 365.
With the right questions and permissions, you can use Forms for plenty of high-level functions such as organizing events, requesting feedback internally or externally, and streamlined data collection. Those three broad categories include a lot of potential applications, including metrics, customer satisfaction surveys, lead capture, referral info, training comprehension, reservations, RSVPs, and more!
In our recent virtual session, we explored just a few of the many functions that Microsoft Forms has to offer. You might be using an external tool like SurveyMonkey, SurveyPlanet, or Google Forms for these functions because you didn’t know about Microsoft Forms, or you weren’t comfortable working with it.
But by switching to Forms, you can get the full functionality of these other products without the added charge – and even more importantly, the data goes directly into SharePoint without any need to export! That means easy access, easy team collaboration, and even automated actions through Power Automate. If those sound like effort-saving functions to you, then this article is worth a few minutes of your time.
Asking the right Questions
A well-chosen prompt can be the difference between valuable information and a pile of useless responses. While it’s important to think through your form’s logic and phrasing independently, Forms will also do quite a lot to help you out with your prompts.
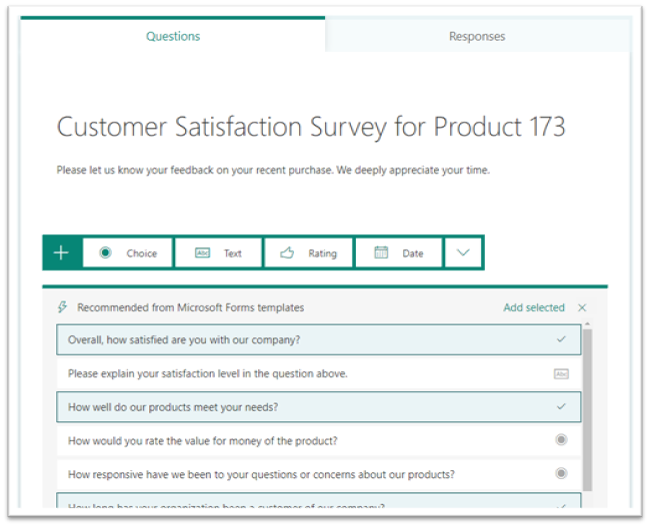
When you hit the “+ Add New” button, Forms will automatically populate a list of suggested prompts. It does this by reading your title and description and finding other templates that match those keywords. You can select as many of these suggestions as you want, then click “Add selected” to kick-start your form. Or, you can forgo the suggestions and choose from the list of form types: Choice, Text, Rating, Date, and more in the dropdown.
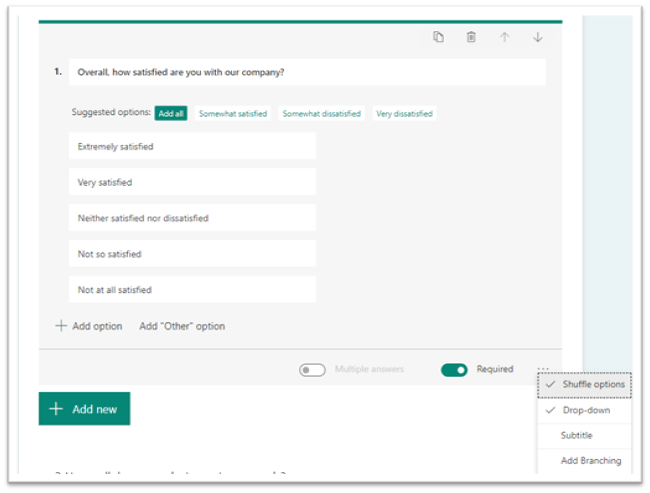
Whichever way you choose, you’ll then want to customize each prompt for clarity and response options. Clicking a prompt will open it for editing, and give you a range of options – maybe you just want to edit the text or delete the prompt, or maybe you want to toggle one of several additional settings like Shuffle Answers, Required, or Drop-down. Some change how the prompt displays, some change how users can interact with it, but they can all help you fine-tune your respondent’s experience. These options are fairly intuitive, but if you’re unsure of one, you can toggle it to see real-time how it alters the prompt.
We encourage you to experiment with these question types based on your needs, but there are two functions we want to draw attention to specifically: Contact Info and Branching.
Contact info
If your form is exclusively internal, for other Microsoft 365 users in your company, you don’t need to worry about this: Forms will automatically log each respondent for you by default. But if you’re sharing it externally (say, as a survey link at the end of a thank-you email) or with employees who don’t have a Microsoft 365 account (e.g. light industrial, customer service), you might want a way to get in touch with your respondent to ask follow-up questions.
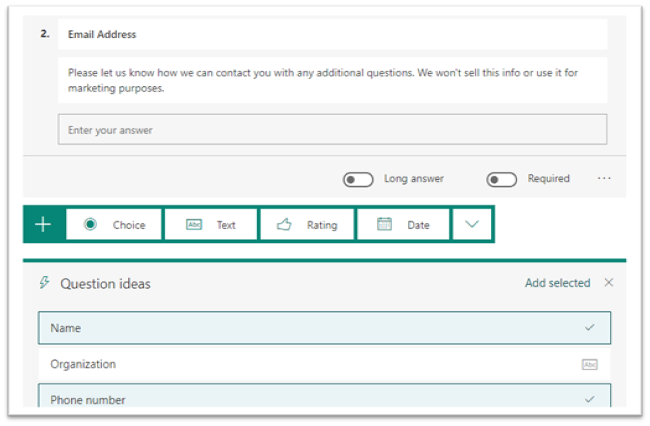
A text prompt is a great way to capture this info, and Forms will even catch on to what you’re doing: if it notices you’re including a question about contact information (such as Email Address in the example below) the next time you click “Add new” you’ll receive several new suggestions like Name, Organization, and Phone Number. You’ll probably still need to tweak these, but it’s a good trick to save a bit of time and effort.
Branching
If your form has a lot of questions, and especially if those questions contain plenty of conditional statements like “if you answered ‘YES’ on Question #7…”, you’ll want to be sure you make use of Branching. It’s an automated function that allows you to customize a respondent’s experience, keeping out irrelevant questions and maintaining their focus by automatically jumping them to the next question you’ve identified as relevant.
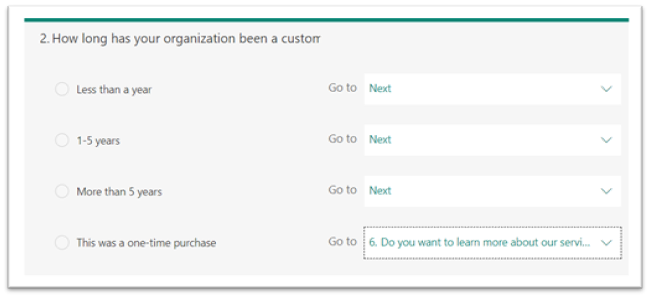
You’ll want to do a little bit of thinking about your setup here, because implementing this change will affect everyone who takes the survey. People can’t see questions that come after a branching point until they’ve made a selection, and there’s potential for the “Go to” logic to tie itself in knots.
Our biggest tip is to create every question you want to ask first, then start branching them together. The logic paths are easier to track if you’ve got every endpoint set up already. Just remember that branching tends to hide certain questions, and keep tinkering with it to figure out the logic that works for your needs.
Tweaking your form's Settings
After you’ve established your individual settings, you’ll want to check over the settings for this form as a whole: things like who can respond, when they can respond, and how follow-up communication with them will work. You can find these under Settings in the breadcrumbs at the top right.
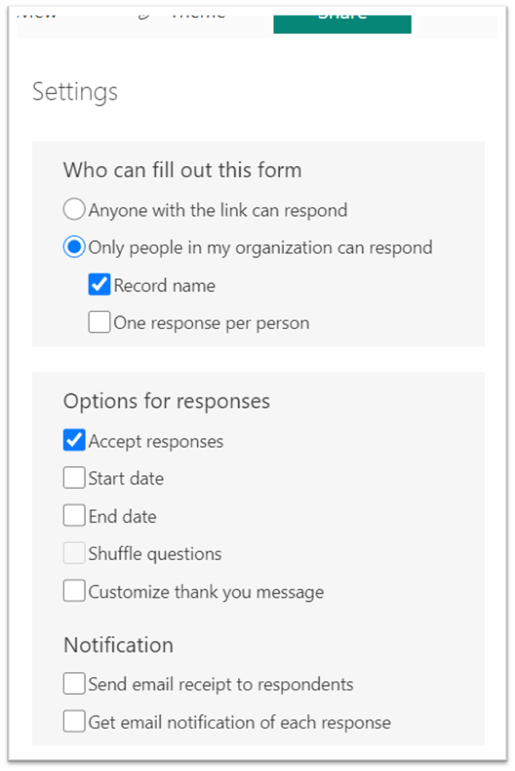
Several of these settings depend on each other, or on other changes you’ve made to the form. Shuffle questions is unavailable if you have branching enabled, since changing the order for each person would ruin the branching logic. Email receipts also can’t be sent to external respondents, and the form won’t automatically record their names.
Sharing your completed form
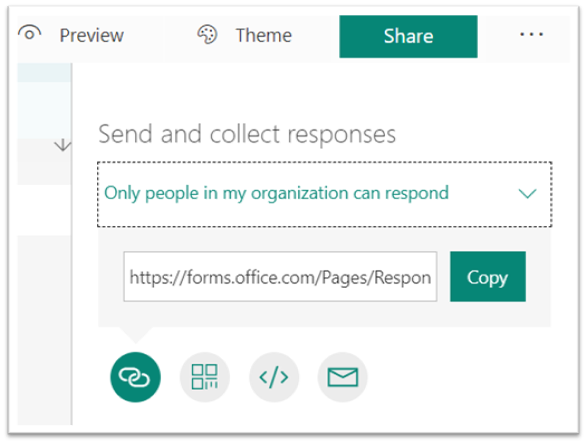
Once your form is finalized, and all the settings are to your liking, it’s time to share it so you can start gathering responses! Clicking the Share button will give you a range of options to send your form to others. This will show up as a link by default, but you can also email it, publish it as a QR code, and even embed the form in other webpages – see the end of this article for an example of what that looks like!
You’ll also notice two further options in this window: “Share as a template” and “Share to collaborate.”
Sharing as a template can help you subdivide the work…by sharing an employee opinion survey with each department’s manager, for instance, you can give them control over the responses and data, while making sure the questions stay exactly the same for each department.
Sharing to collaborate allows your collaborators to actually edit the survey’s questions and settings, as well as view the responses and data that comes in. Your collaborator will need a Microsoft 365 account of their own, but beyond that there’s no special permission needed – it’s as simple as pasting the link into your browser!
A note on collaboration & the big picture: My Forms vs. Group Forms
As you create these forms and start sharing them, you should carefully consider where they will live. Much like the difference between sharing a file in a Chat vs. a Channel in Microsoft Teams, sharing a file from My Forms vs. putting it in Group Forms is a question of privacy and permanence.
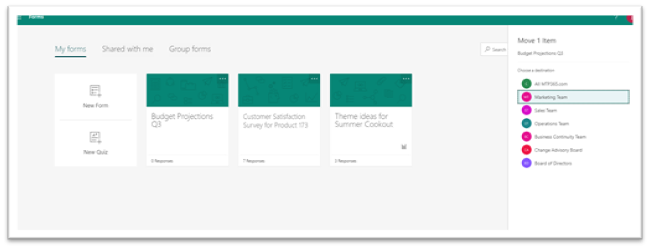
Building a form in the My Forms tab means it’s only accessible to you, and anybody you share permissions with. But then that form relies on you: if you change teams or leave the organization, it becomes inaccessible to the rest of the team. If you want to give it longevity and accessibility, you should select the “Move” option from the form’s breadcrumbs in your main My forms window. From there, you’ll see the option to select a SharePoint team to send it to. It’s that simple!
Group Forms are tied to a specific location in your SharePoint directory, and will be shared (by default) according to those permissions. Plus, there’s one more advantage of a Group Form: any Excel files you create from its responses will live in that SharePoint location, and will automatically update with each response!
Visualizing your Responses & Data
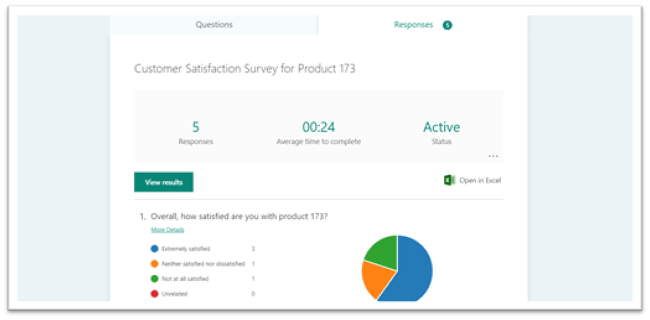
Once your form is sent and responses start coming in, the Responses tab is where you’ll go to track the information coming in and use it to make your decisions. After a basic-info header that gives status, response number, and average completion time, you’ll see the list of questions with a breakdown of responses in chart or list form, depending on the information involved.
If you’re looking for more robust data, you can open the form in Excel from this page. From there, you might want to incorporate the data set into a visualization with Microsoft Power BI, for instance. Remember: you can only create a permanent, automatically-syncing dataset using Group Forms – if you’re in My Forms, you can only export “snapshots” of the data, which won’t update if further responses come in.
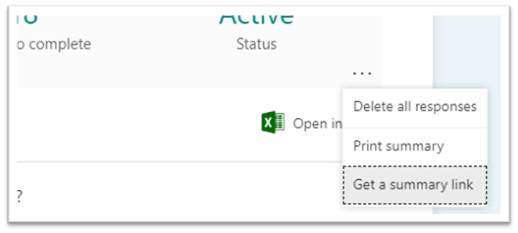
If you don't want to mess with Excel sheets but still want to let a coworker access the raw data, there's a way you can easily share access to just the results. By selecting "Get a summary link," you can create a copy/paste link for easy sharing to anyone, both inside or outside your organization. This summary page doesn't have the entire breakdown of each response, but it features key points that you can share with your coworkers or partners.
One thing unavailable on the summary page is a respondent breakdown: the ability to see a single respondent's entire set of answers. By clicking the “View results” button, you can read each respondent’s answers on a separate page. If you get a confusing or negative comment, seeing that single user’s experience can help you form a better picture of the issue, or potentially reach out to resolve any problems.
Don't fiddle with it too much
One last consideration: by default, this survey will still be editable after you’ve shared it. That means you might be able to go in and add/delete questions or change phrasing after responses have already come in. While this might work for certain emergency situations, or instances where sensitive data is shared by mistake, we don’t recommend making a habit of it. As soon as you start changing responses, you skew the prior responses that had/didn’t have that option available. Remember that the point of a form is to gather useful info – you don’t want to taint the validity of your data!
Quick Polls
The majority of this article covered the full-fledged Microsoft Forms function, but there’s one last short-form Teams integration you should know about: Quick Polls.
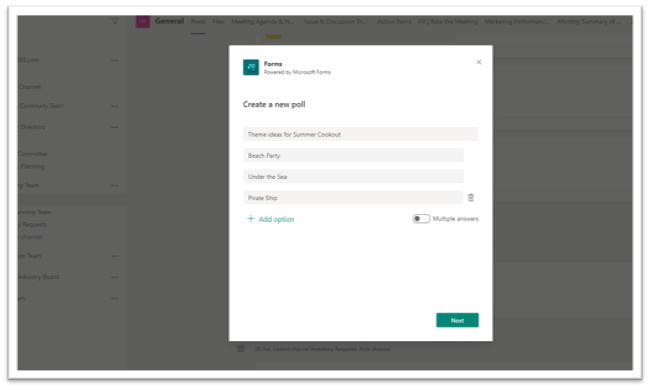
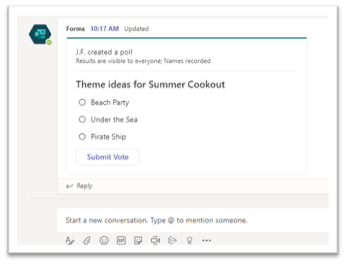
Quick Polls are exactly that: a way to quickly poll a team, directly from the chat window in a Microsoft Teams channel. They’re easy to set up: just click the breadcrumbs under the chat bar and select “Forms” from the list of available extensions. Then fill in your options and publish it! The poll card will show up in chat, alongside a second card that tracks responses.
You’ll notice the options here are heavily limited: you can only give a short list of text options, and “multiple answers” is the only setting you can change. You can’t even edit the questions after you’ve posted it, though you can still view individual responses in your Forms app.

Quick Poll isn’t a very robust survey option, but it can help you to quickly gather the info you need without wading through additional options and settings. And you can do it all from Microsoft Teams, with no need to open yet another app (are you noticing a pattern yet?).
Putting it all together
Forms is one of the most useful and flexible tools available to you as a Microsoft 365 user, and making full use of your Microsoft 365 tools can help you in any area of business. We’re sure there are plenty of further applications for Forms that we haven’t even considered – but those just might be up for you to discover and use for yourself!
Remember when we mentioned the Embed feature of sharing a form? Check out the one below, and please let us know what you thought of this article.
Thank you! We hope you’ve gained something from this discussion. And if you haven’t, well – hopefully we’ll find that out soon, won’t we?