
Virtual meetings are more popular than ever, but hosting a large meeting via Microsoft Teams presents unique challenges. In a recent session, we discussed five different ways you can meet & present with Microsoft Teams, and the last of those functions - Live Events - deserves its own focus.
A Teams Live Event is a great way to host online presentations both internally and externally, and boasts a range of functions to give your presentations that extra level of polish, whether they’re department-wide trainings or public-facing webinars (sound familiar?).
If you have the appropriate license, you can effortlessly present from directly within Teams. It may not fit every presenting need, but it’s a great option if you have some information you need to distribute to an audience of a dozen or more, and you want to avoid distractions. Teams works seamlessly with the rest of Microsoft 365 to give you a polished presentation in just a few clicks.
License restrictions
One important piece to note before we start: unlike the majority of Microsoft 365 tools we’ve covered, Teams live events aren’t included in its basic license, or in Small Business Plans. You’ll need one of a few specific license types – E1, E3, E5, or Education licenses A3 or A5.
If you don’t have one of these types and you want to make full use of the tools detailed in this article, you might want to consider changing your subscription level. This applies to anyone who participates from the organizer’s side of things: the Organizer, Producers, and Presenters (see below) each need this license type to join the event group.
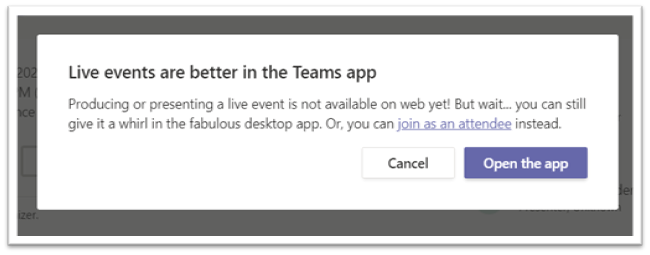
Finally, another small note: unlike the overwhelming majority of Microsoft 365 features, hosting a live event isn’t possible from a browser (yet). Attendees can join from the browser, but if you want to be part of the hosting team, you’ll need to run the event from your desktop Teams app.
Creating a live event
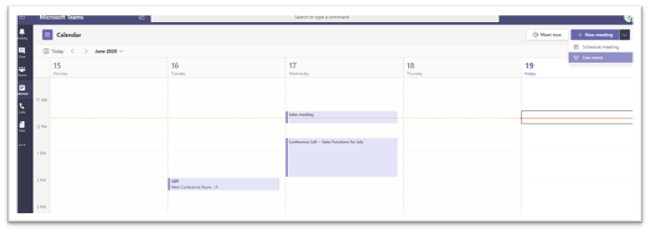
There’s no complicated process or special app you need to create a Live Event – just open the Calendar panel in Microsoft Teams and click the top-right dropdown next to “New meeting.” Note that this option will only appear if your license includes live events (see “License restrictions” above).
Details panel
From here, you’ll get a scheduling popup to fill in common details (date, time, description). One piece of info to watch for is the “Invite presenters” search bar. This is crucial if you’ve got other people presenting with you, which we encourage in most cases: think about who you need on the team and how they can help you present effectively. You’ll also assign each member of your event group – including yourself – one of two roles: “Presenter” or “Producer”.
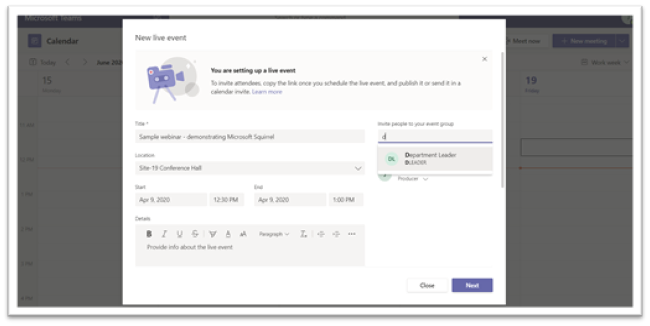
As the Organizer, you’re the only one who can make the top-level admin changes, but aside from that you can take whatever role you work best in. A Producer is generally behind-the-scenes, watching everything that happens, and a Presenter is typically on-camera and possibly sharing their screen or a slideshow presentation. We recommend having at least one of each, and potentially more, depending on your presentation type.
Settings panel
The next screen handles many of the settings and permissions for your Live event. You can adjust plenty of things from this panel, like whether Captions are enabled, whether the session will be recorded (which we recommend), and whether attendees can participate via Q&A (strangely, the only choice that isn’t on by default!). As the Organizer, you – and only you – can change any of these settings up until you start the meeting. After that, the meeting has begun and there’s no turning back.
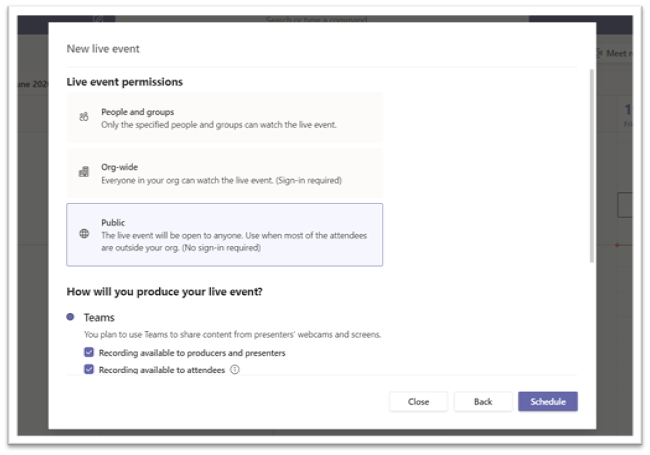
A crucial setting – one that’s even caught us in the past! – is your “Live event permissions.” Remember to double- or even triple-check this setting, to make sure that your audience doesn’t get blocked from joining the meeting! If you’re having trouble toggling the Public option, or if it’s grayed-out, your company-wide security settings might be preventing an external live event – you’ll need to check with your Microsoft 365 administrator to see how you can enable those permissions while maintaining company security.
Joining the meeting
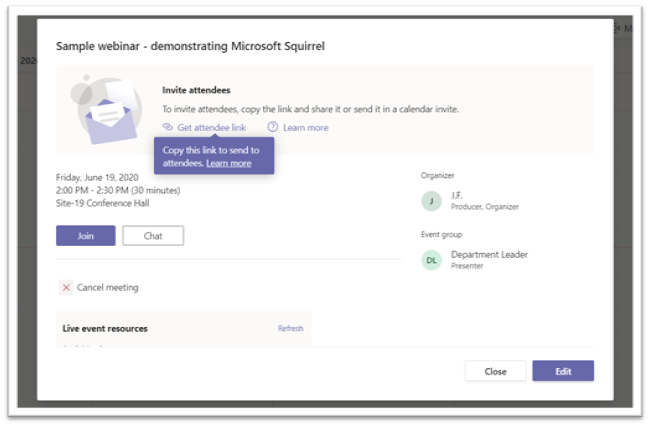
Once you’ve Scheduled the event, it will appear as a scheduled meeting in your Teams calendar. The Organizer, Presenters, and Producers can join by simply opening the scheduled meeting in their Teams calendar panel and clicking “Join.”
But for all other attendees, you’ll need to copy the attendee link at the top of this screen and share it by whatever means work for you – an email, a blog post, a hyperlinked chat message, to name just a few. Microsoft Teams doesn’t require registration or sign-in for External events, so promotion and registration are up to you. We’ll talk about our approach to that need later in this article.
Hosting a live event
Once you join the live event as a member of the event team, you’ll see different screens depending on your role. If you’re a Presenter, you’ll see a single screen and an option to share your content & video, as well as some controls we’ll get into in a bit.
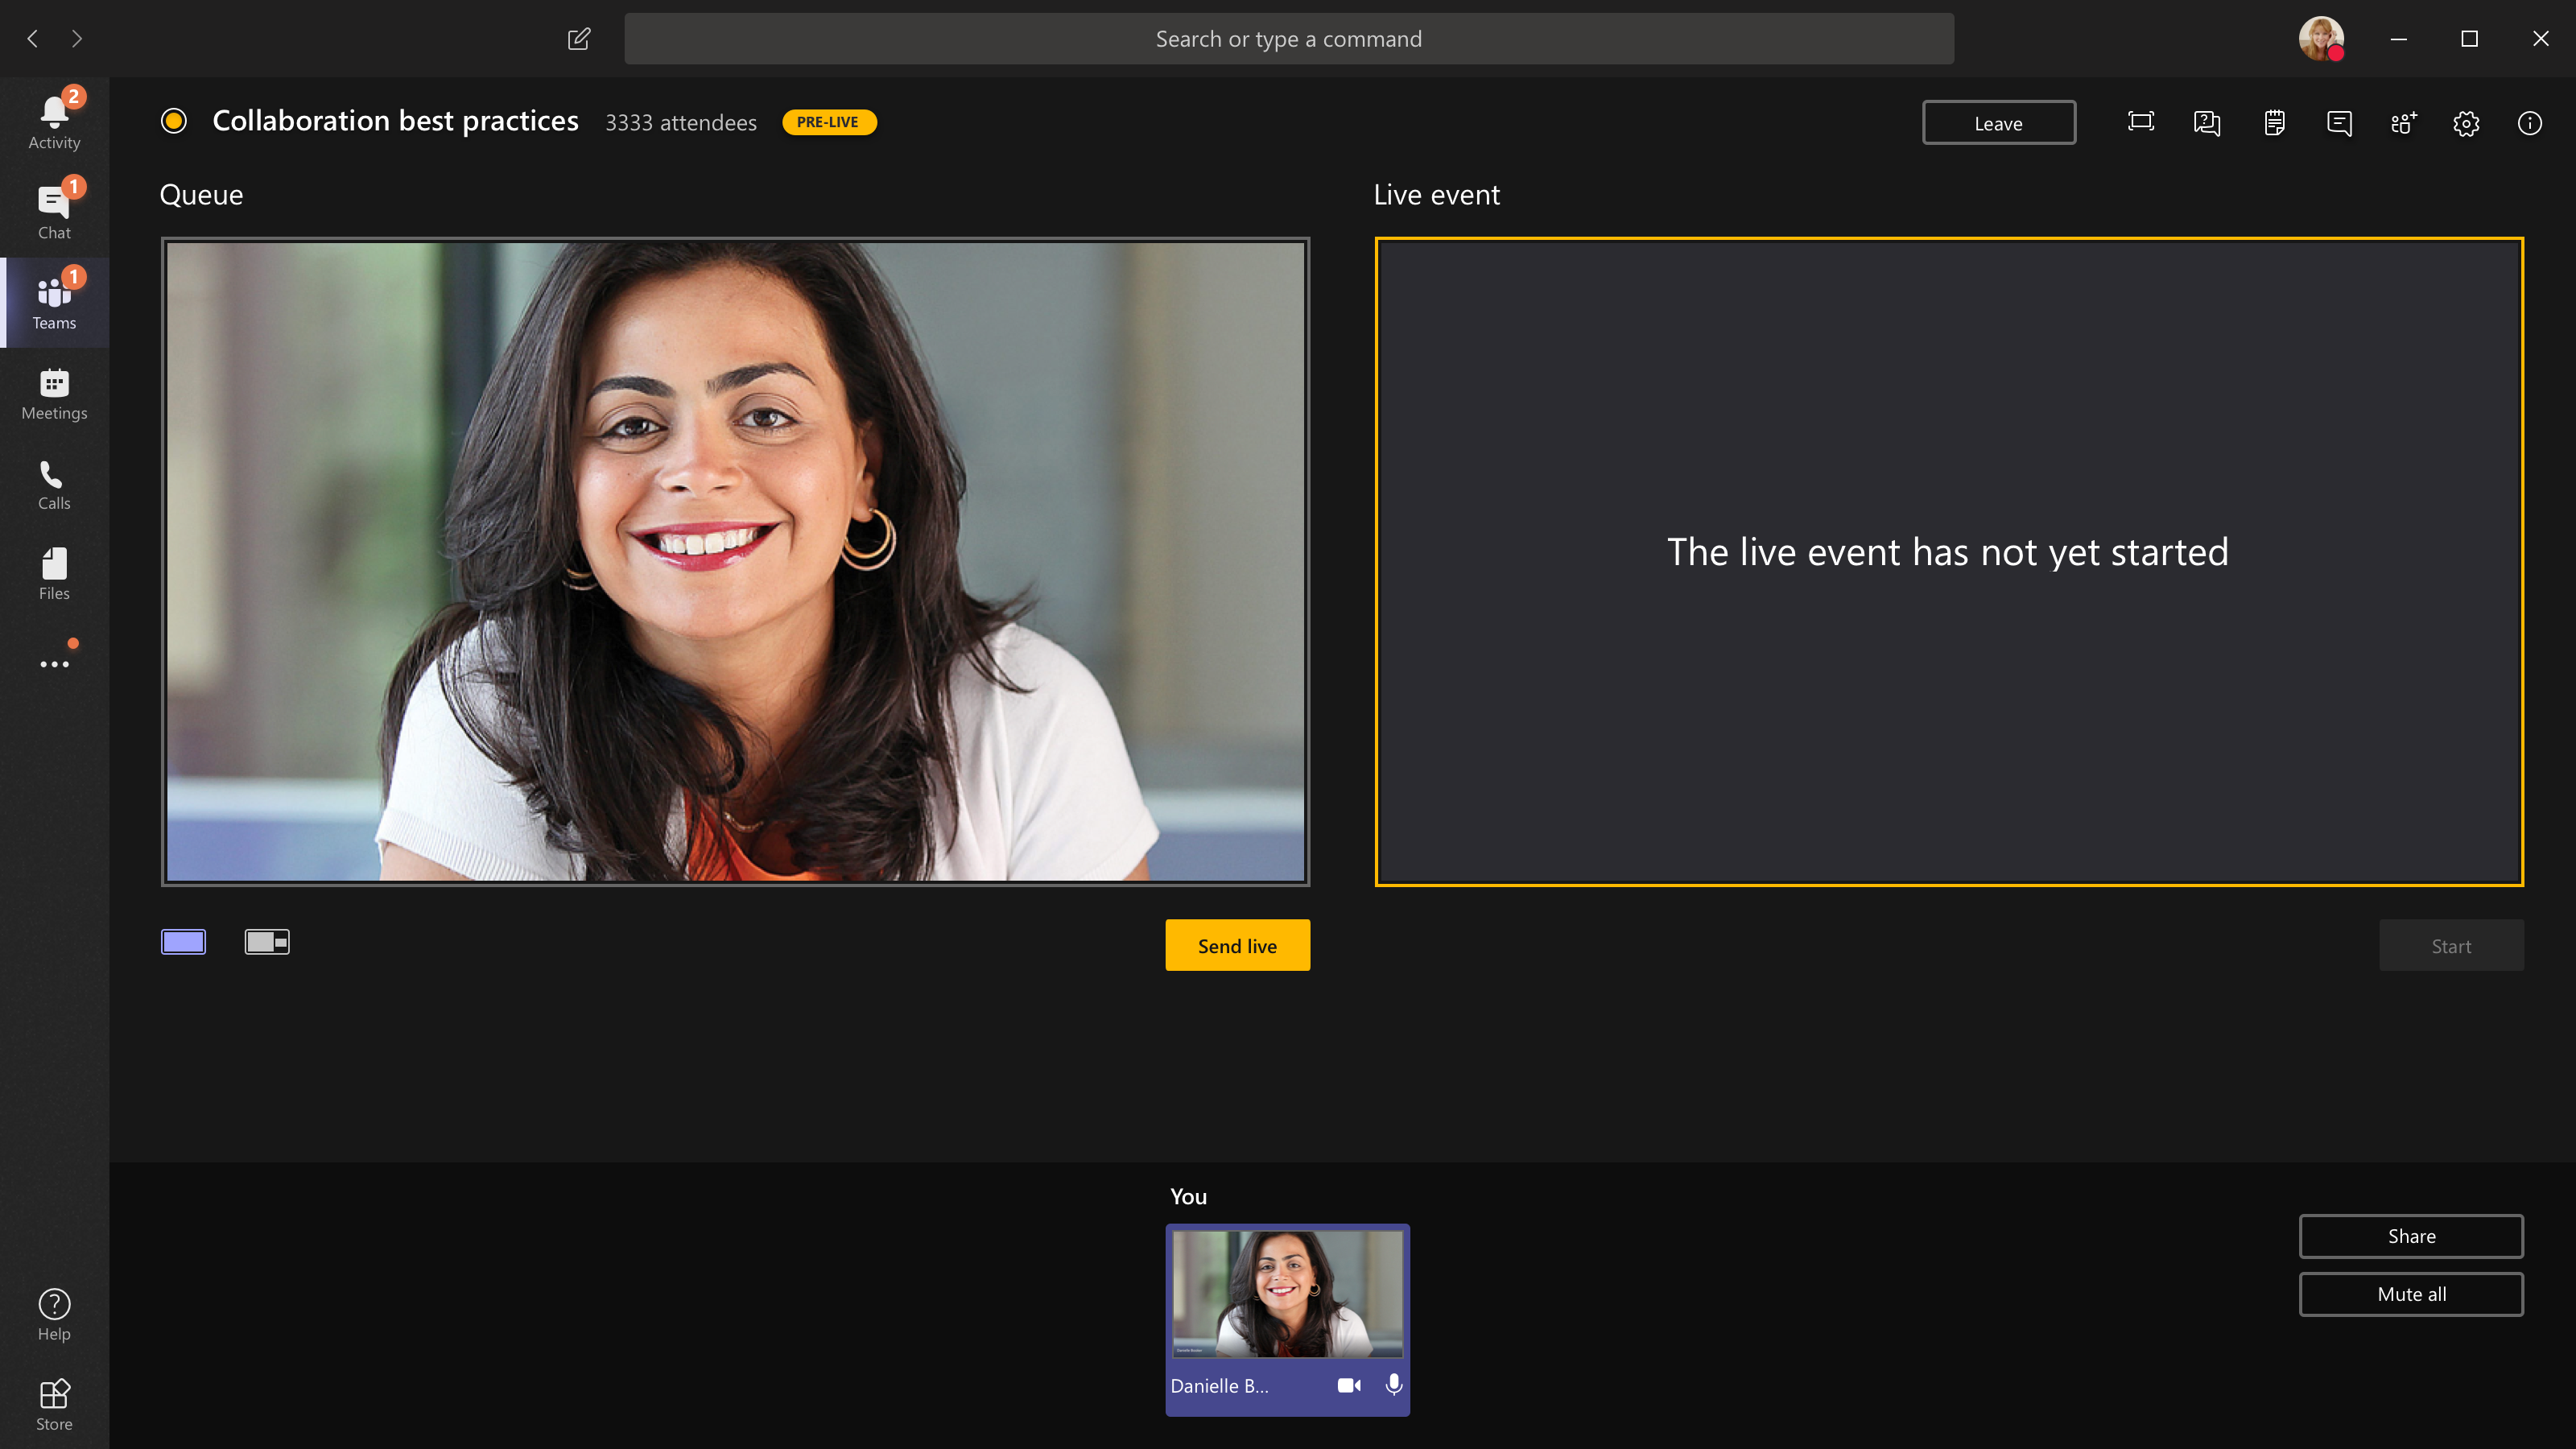
If you’re a Producer, your role is essentially a kind of switchboard operator, and your screen will look something like this:
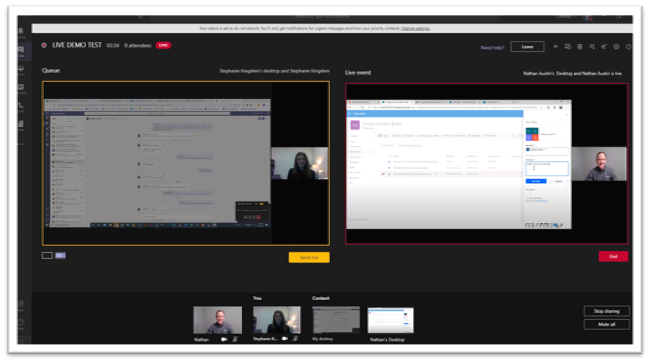
On the right is the Live event screen – what attendees actually see. On the left is your Queue: the next material, if any, that’s on-deck to be presented. You’ll also see a list at the bottom of all your available videos and content, which can be selected for the Queue and sent live to the event.
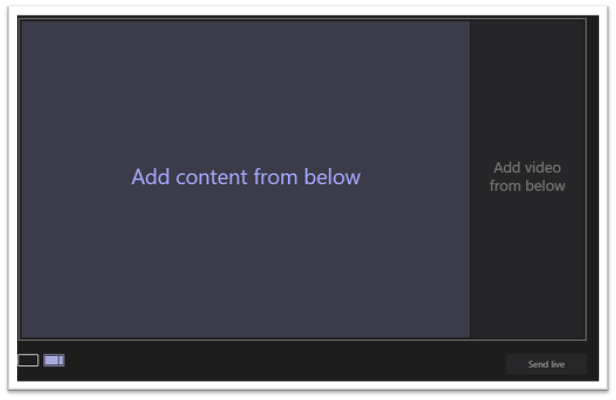
One important thing to note is that there are two ways to set your presenting screen – content alone, or content & video. You can see in the above example that both Stephanie and Nate are presenting content & video, with a small video on the right and their screen shared on the left. This can be toggled by the purple icons in the bottom-left corner of the screen, as seen below.
You can’t have 2 video feeds playing simultaneously in Microsoft Teams, so there’s no way for Stephanie and Nate to both be on-screen at the same time. However, all members of the event group (Producers and Presenters both) can share their audio to the event.
While the live event is going on, you may need to communicate back and forth to each other discreetly –but some of you are live on-camera! Thankfully, Teams has a built-in Meeting chat that’s only accessible to your event group – you, Presenters, and Producers – through the row of icons at the top-right.
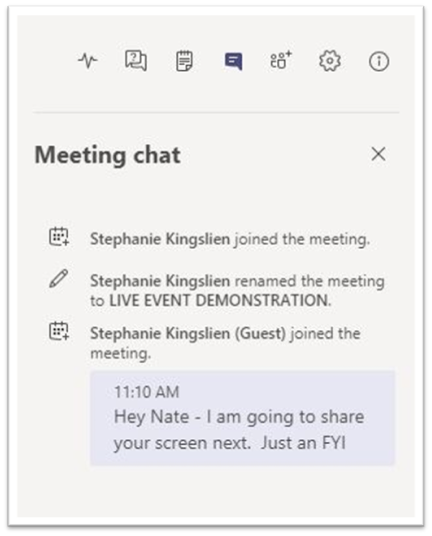
Making full use of this chat allows everybody to keep each other updated on what’s coming next in the presentation, without having to tab away to another chat app.
Finally, a feature of many presentations is Q&A capability – maybe you want to collect responses or questions to answer later, or maybe you want to encourage dialogue right now while you’ve got everyone on the call and answer those concerns! The Q&A panel allows you to receive, filter, and publish any good questions while avoiding any irrelevant or inappropriate ones.
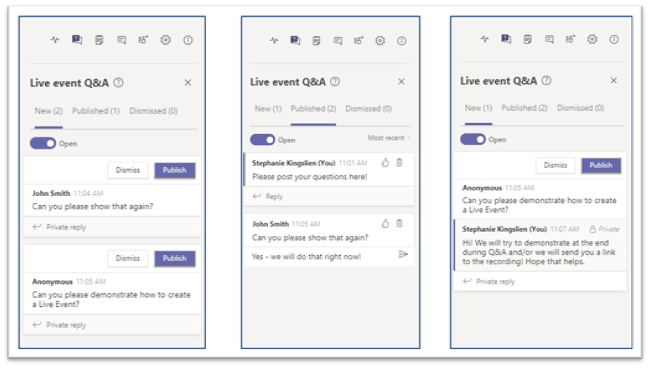
One handy feature of the Q&A panel: Producers and Presenters can view questions and respond to them privately, without the need to publish them! If you still want to Publish the original question after it’s been resolved, you can do so – and your private responses will be hidden from all other attendees.
When Mytech runs an event like this, we like to dedicate one Producer to keeping an eye on the Q&A, and pulling in others as-needed or bringing the question up to the on-camera Presenter. Although Q&A is a good way to filter people’s questions – and prevent too many people from “chiming in” and disrupting the presenter – you want to make sure that your participants feel heard and acknowledged, so commit some real thought to your Q&A strategy!
Before & after the live event: what Teams DOESN'T do
Although Microsoft Teams is an effective tool for hosting live events in plenty of different settings, it’s not a robust marketing tool. If you’re hosting this event externally, perhaps as a webinar available to the public (sound familiar?), you’re going to want some promotional prep work as well as some post-event follow-up. We make use of several non-Microsoft platforms for our landing pages, video hosting, and follow-up emails, and can offer you a few tips on your own process.
Promotion & registration
Because Microsoft Teams doesn’t require registration or sign-in for Public live events, technically the attendee link is all you need. But how are your attendees going to get that link? As an email, a landing page, an advertisement? That depends on your intended reach for the live event. Maybe a simple email out to your clients is enough, or maybe you want to launch an entire campaign around this event.
Giving your live event its own landing page is a great way to make it feel a bit more permanent and official. In the past we’ve used third-party tools like Eventbrite, which have plenty of features built in to promote your event. You can schedule automatic email campaigns for your event, promote it and track interest, and much more!
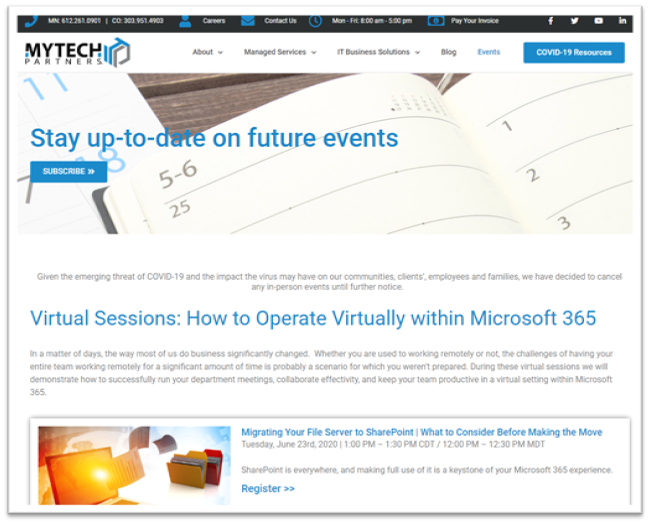
As pictured above, we’ve recently moved our event landing pages internally. The benefits include full control over the site’s design, and some more robust tracking capabilities for how people are interacting with our registration and campaigns. The disadvantages are time and effort – tools like Eventbrite help you eliminate a lot of the fuss and headache of scheduling these events, so if you want a more fire-and-forget solution you’ll want to seriously weigh your options.
Follow-up
Once you’ve finished a public live event, Teams will give you several assets depending on your settings: a video recording of the session, and a list of every attendee’s email. Making full use of both items can drastically improve your audience response and future marketing efforts!
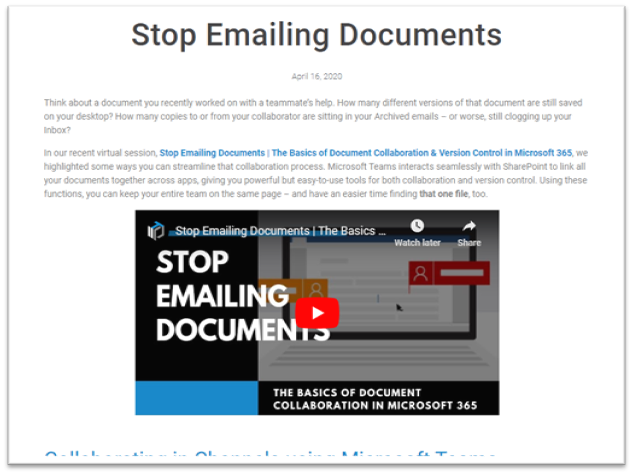
If you put a lot of work into this event and opened it up to the public, chances are that you want this information to last. Even if you don’t plan to do much with it – and especially if you do – you should find a place to host the video, like your company’s YouTube channel. From there, you can host it on your website quickly and easily by embedding the YouTube link – most web design tools make this a fairly painless process.
The other important factor of your follow-up is giving your attendees a reminder about the event. This is most commonly a quick thank-you message, but it can also serve as a reminder of future sessions, a response to any unanswered questions in the session’s Q&A, a link to your YouTube recording of the session, or a spiffy new attendee survey you just completed in Microsoft Forms.
Whatever form it takes, we definitely recommend this step! Keeping your attendees engaged and making them feel important is vital, so find a way to do it that works with your resources. A simple email straight from your Outlook might work for a small or impersonal viewership, or you might use another marketing tool like HubSpot, Constant Contact, or MailChimp to send out more customized email campaigns.
One of many uses
It’s hard to talk about something like a Teams live event prescriptively: it simply has so many different uses. Instead, you’ll probably need to do some further thinking about your own events and strategy surrounding them. What are you hoping to accomplish? What’s getting in your way? And is there a better way to do things? As always, a bit of time spent on those questions often changes your work in big ways.
We discover new things about working in Microsoft 365 daily, all as a part of our promise to Make IT Easy for our clients. If you want to be the first to know about the new stuff we’ve uncovered, please take a minute to sign up for our newsletter and get acquainted with the way we run our Teams live events – here’s hoping we can pass along a thing or two to you!